Getting your measurements right before ordering is the single most important step in a custom glass shower door project. An error of even a quarter inch can turn a seamless installation into a costly redo. This guide walks you through every dimension you need to capture — from the floor sill to the header, wall to wall — using nothing more than a tape measure and a notepad.
Pro Tip Before You Start
Always take measurements in inches, not feet and inches — it eliminates conversion errors and is the standard used in all glass fabrication orders. Write each measurement to the nearest 1⁄16 inch for precision.
What You'll Need
Gather these items before you step into the shower opening:
- Steel measuring tape (25-ft minimum for larger enclosures)
- 4-ft or 6-ft level (to check plumb and square)
- Notepad and pencil — or our free printable measurement sheet
- Painter's tape for marking reference points on tile
- Camera or smartphone for documenting conditions
Step 1 — Measure the Width
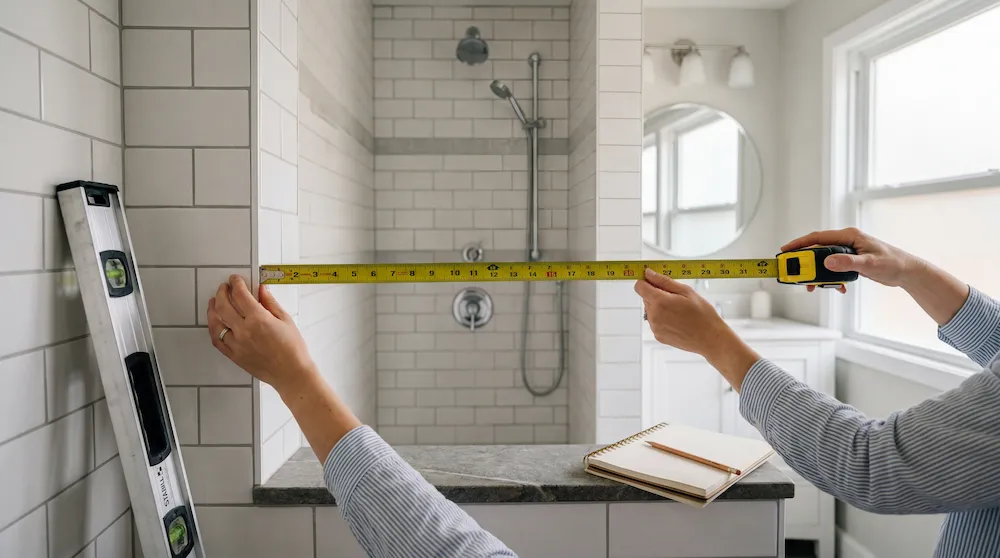
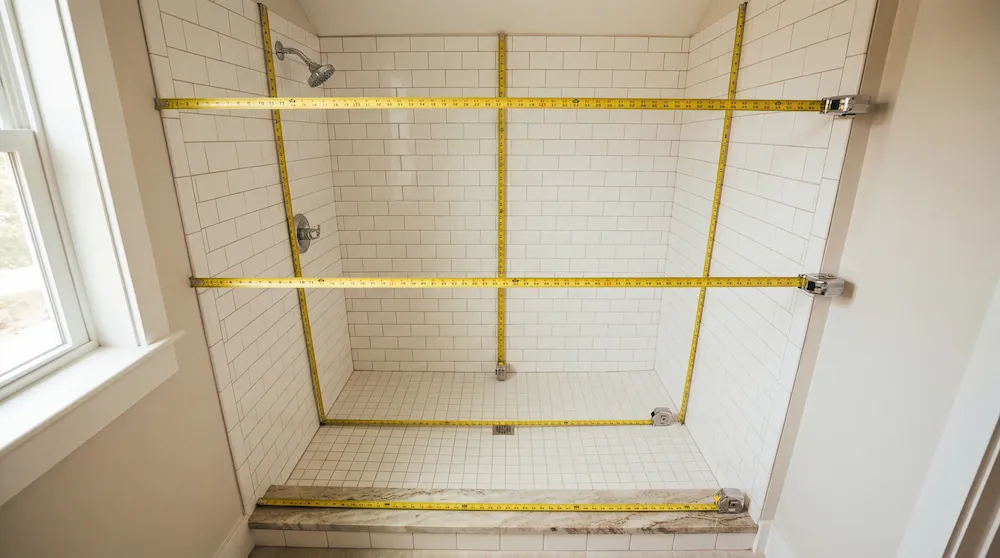
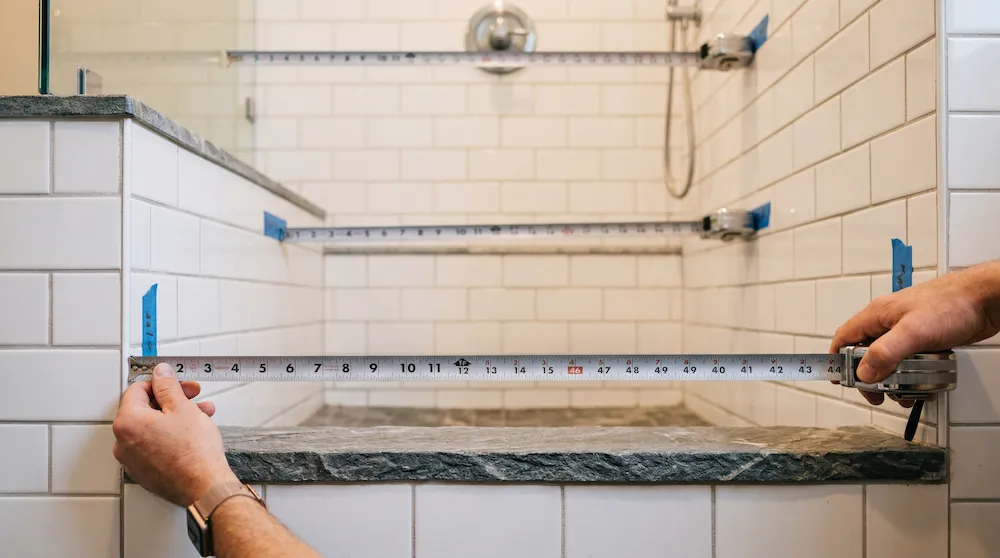
Measure the horizontal width of the shower opening at three heights: at the floor, at mid-height, and at the top of the opening. Use the smallest of the three measurements as your order width — glass is rigid and must clear the narrowest point.
- Hold the tape measure hook at the left finished wall surface (tile face, not stud).
- Pull across to the right finished wall surface and record all three measurements.
- Note any variation greater than 1⁄4 inch — this signals an out-of-plumb condition that requires a custom-cut panel or a bevel strip.
Step 2 — Measure the Height
Height is measured from the top of the shower curb (or finished floor for a zero-threshold) to the underside of the header, ceiling, or to your desired door height. For frameless bypass systems, height determines where the header channel will sit.
- Set one end of the tape on the curb surface (not the subfloor below).
- Measure vertically at the left wall, center, and right wall.
- If ceiling height varies by more than 3⁄8 inch, flag this for our team — the top track may need a scribe cut.
Curb Height Matters
A standard shower curb is typically 3–4 inches tall. Deduct the curb height from your floor-to-ceiling measurement only if you plan to mount the door on top of the curb (the most common installation). If your design calls for glass to run floor-to-ceiling past the curb, measure from the finished floor to the ceiling instead.
Step 3 — Measure the Return Wall Depth
For neo-angle and three-wall enclosures, you'll also need the depth of the return wall — the side wall that runs perpendicular to the shower door opening. This measurement tells us how wide the fixed return panel needs to be.
- Measure from the back wall (straight back) to the front edge of the opening at the floor level.
- Repeat at mid-height and top — some walls have protrusions from plumbing chases.
- Note the location of any soap niches, grab bars, or built-in shelving that might affect panel clearance.
Step 4 — Check for Square and Plumb
Even new construction is rarely perfectly square. Checking at this stage prevents surprises during installation and lets our fabricators add any needed clearances to the cut file.
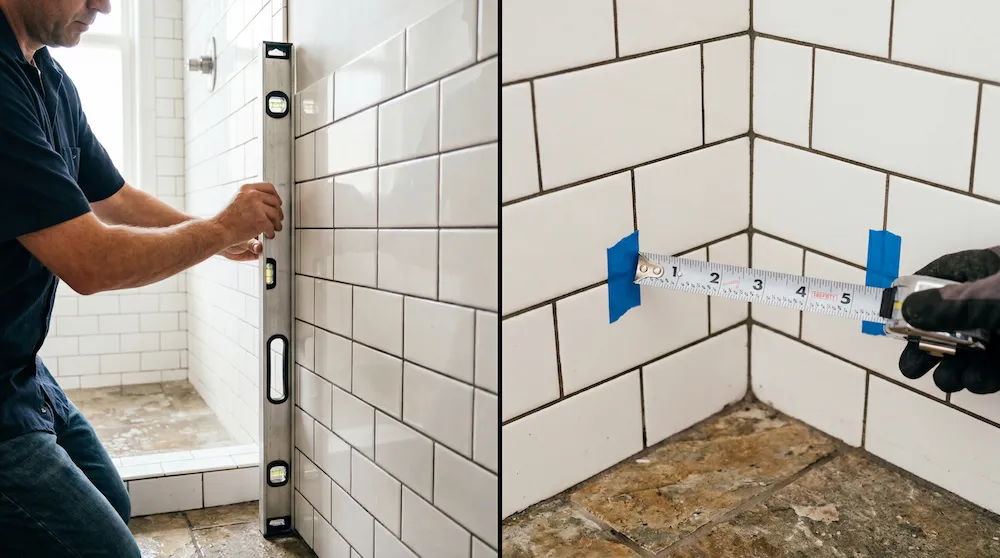
- Hold your level vertically against each tile wall. Note the gap at the top or bottom — this is the out-of-plumb measurement.
- Check the floor angle with the level held flat from front to back, and side to side.
- Use the 3-4-5 method to check square: mark 3 inches along one wall and 4 inches along the adjacent wall. The diagonal between those marks should be exactly 5 inches if the corner is square.
Common Measuring Mistakes
After hundreds of installations, our team sees the same errors come up time and again. Avoid these pitfalls before you submit your order:
Measuring to grout lines, not tile faces
Glass sits against the tile face. If you measure to a recessed grout line, your panel will be short by up to 3⁄8 inch per side.
Taking only a single measurement per dimension
One measurement never tells the full story. Walls taper, floors slope, and ceilings dip. Always take three measurements per axis.
Forgetting door hardware clearance
Hinges, handles, and U-channels require clearance from the wall edge and curb. Leave a minimum 1⁄2 inch from the tile to the glass edge for U-channel depth.
Measuring before tile is installed
Tile adds typically 3⁄8 to 3⁄4 inch per tiled surface. Always measure after your tile work is fully grouted and cured.
What If My Walls Aren't Square?
This is more common than you'd think — and it's completely workable. When a corner is out of square by more than 1⁄4 inch over the height of the door, a standard rectangular panel will leave a visible gap. Here's how we handle it:
- Scribe cut panels: Our fabricators can cut a slight angle along the edge of the fixed glass panel so it follows the wall angle exactly. This is the most elegant solution and is included in all custom orders.
- U-channel with silicone: For smaller discrepancies (up to 3⁄8 inch), the U-channel that captures the glass edge is packed with a bead of clear silicone that fills the gap invisibly.
- Floating glass clips: On pivot door systems, adjustable pivot hinges allow up to 5° of angular compensation without any panel modification.